One of the modifications that I commonly make to my military vehicles is to add a keyed battery master disconnect switch. This adds a small amount of security even though the switches all use the same key and have simple warded locks, because the trucks normally don’t have any keyed locks or switches at all. The switch I usually use is Pollak part number 51-916, and I buy them from various distributors or on eBay. They are much better switches than the cheap plastic knock-offs of Hella switches or battery-mounted knife switches that are commonly found. There are also similar heavy-duty switches that other military vehicle collectors like to use, but I stick to this model so I only have one kind of key to keep on hand. I just finished installing one of these in my new M923, and here’s how I did it.
So, on the M939-series trucks, the batteries are normally located inside the passenger seat in the cab. There’s a battery relocation kit that moves them to underneath the cab; I think it was intended for use in trucks with added armor that interferes with the normal battery box, and many collectors add the relocation kit just because they like having the batteries outside the cab, or so that they can replace the big box seat with a spring-ride or air-ride seat. My truck still has the normal in-cab battery box, and I don’t expect to put in a relocation kit.
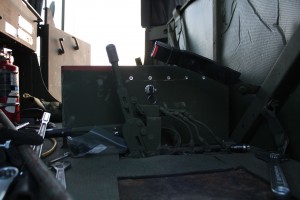
Good locations for battery switches vary depending on the truck design. With the battery box in the cab, I picked the left wall of the battery box, which is easily reached by the driver. It’s also a bit out of sight, possibly adding a tiny bit more security. The M923 has connections to both the 12V tap and the normal 24V point of the 4-battery series/parallel pack. The 12V circuit is only used to power the cab heater fan at low speed. There are plenty of valid arguments for installing a battery disconnect switch in either the positive or ground circuit, and I picked the ground side after making sure that nothing would still be able to draw power from the top pair of batteries with the ground connection opened up.
The battery cables exit the battery compartment (as well as the truck cab) via a pair of grommeted holes in the floor of the compartment, near the center of the four batteries. After exiting the cab, the ground cable travels towards the left side of the truck, then forward to the starter and engine block. The original cable wouldn’t reach over to the position I chose for the battery switch through the original hole, but I found that by adding another hole through the floor of the compartment right under the switch, I could simply re-route the ground cable through that hole rather than replacing it with a longer one.
I’d need to add a cable from the switch to the ground connections of the bottom pair of batteries, and I’d also need to move the slave connector’s ground cable over to the switch. The slave cable was too short to reach over to the switch. Rather than making two new cables, I used the old slave ground cable to make the switch to battery connection, and then made a new cable from the slave connector to the switch. I made the cable out of 1/0 gauge welding cable with crimped-on lugs.
With everything planned out, it was time to start working on the truck. I found that it was hard to get to the left side of the battery compartment with its lid in the way (the lid is the passenger seat, hinged over at the left side), since I’m neither as small nor as limber as I was when I was younger. So, I decided to remove the cover for easier access. This is where I ran into my first unexpected problem. The seat hinge wasn’t screwed on with captive fasteners, and I couldn’t reach around it well enough to hold a wrench on one side of each screw and a screwdriver on the other side. After lots of cussing, I decided to just cut off the mounting screws from inside the box, and then install rivnuts to make the cover easier to mount and dismount in the future.
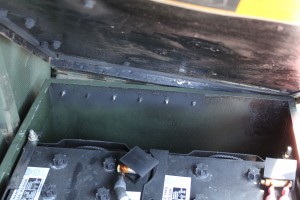
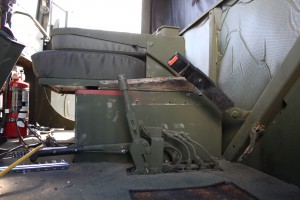
I also removed the driver seat to give me more room to work. I pressed the spare tire davit into service to make it a little easier to get in and out of the cab. For the battery cover with its somewhat heavy passenger seat on top, I just had to lift it in and out the hard way.
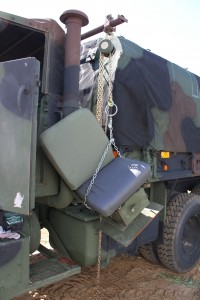
For the main switch hole that I had to make in the side of the battery compartment, I started with a Roper-Whitney hand punch, then finished with a 3/4″ knockout punch. That’s 3/4″ actual diameter, not 3/4″ trade size… I had to order the punch, as the knockout punches at the local hardware stores are just available in trade sizes for conduit fittings. The switch also required a 1/4″ hole for its anti-rotation lug.
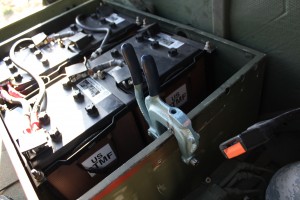
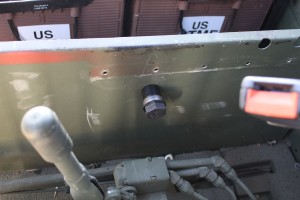
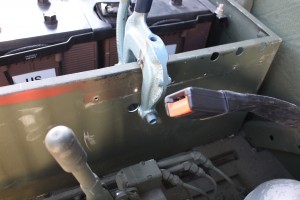
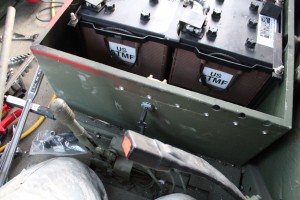
For the floor hole, I started with a drilled pilot hole, then enlarged it with a 1/2″ trade size knockout punch for the larger draw screw of the next knockout punch, and finally finished it with a 3/4″ trade size punch that made about the right size hole for the MS35489-110 grommets used in the floor holes. I found the grommet I needed on Amazon, and used a rubber stopper from the hardware store to plug the old ground cable hole.
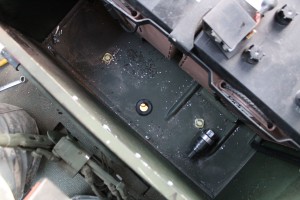
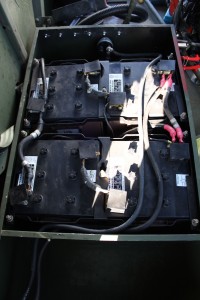
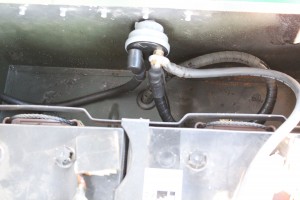
By this point, things were going more smoothly… except for the slave connector, which was hard to get wrenches onto, and which didn’t want to go back through its hole with the thicker ground lug that I used attached. I ended up drilling out the pop rivets securing its bolt plate and protective cover inside the cab, and making a notch in the cab hole and that bolt plate to make more clearance for it to pass through the hole.
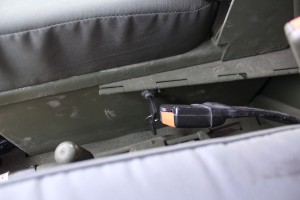
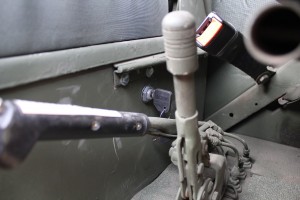
It’s all back together now, and the switch works just fine. It’s easy to reach, somewhat out of sight, and it doesn’t seem to interfere with the transfer shifter or brake lever.
Hi.. waiting for EUC so I can pick up my two 923’s.. MV is all new to me.. Why do the M900 series have four batteries rather than the Deuce?
I too will need to add a hidden cut off switch.. thank you for the detail.
Congratulations on your new trucks, and I hope you don’t need to wait too long for your EUC. My last EUC took about 2 weeks to clear.
The four batteries in the M923 are in a series-parallel combination. Each pair of batteries is wired in series for 24V, and then the two pairs of batteries are placed in parallel to double the available cranking current. I think they did that just to help crank that huge 855 cu. in. engine in cold weather. There is also a connection to the center tap of one of the pairs of batteries, which provides 12V for the heater fan in low speed mode. I haven’t tried it, but I think that only using two batteries would work in a pinch, as long as it’s not too cold.
Where I live in southern California, I never need to use the built-in cold starting aids like manifold heaters (which are on most 2.5-ton trucks) or ether injectors (on the M923, and some 2.5-ton trucks). It just doesn’t ever get cold enough here to need them.
Mark,
Did you install a battery cutoff switch in your hmmwv? If so, where? I’m trying to figure out a discrete place to put one on my M1038.
Thank you for all your great info!
Paul Duffin
Yes, I installed a keyed battery disconnect switch made by Pollak. I don’t think I have any pictures handy, but I installed it in the center hump near the shifter housing, so it’s easy to reach from the driver’s seat. Since I needed to pass an additional high-current cable from the battery compartment to the underside of the body, I bought another of the same insulated feed-through terminal that’s already used for the positive connection, and installed it in the battery compartment wall next to the original feed-through.
Edited to add: In my HMMWV, I used the same type of switch that I used here in my M923. It’s my go-to battery disconnect switch.